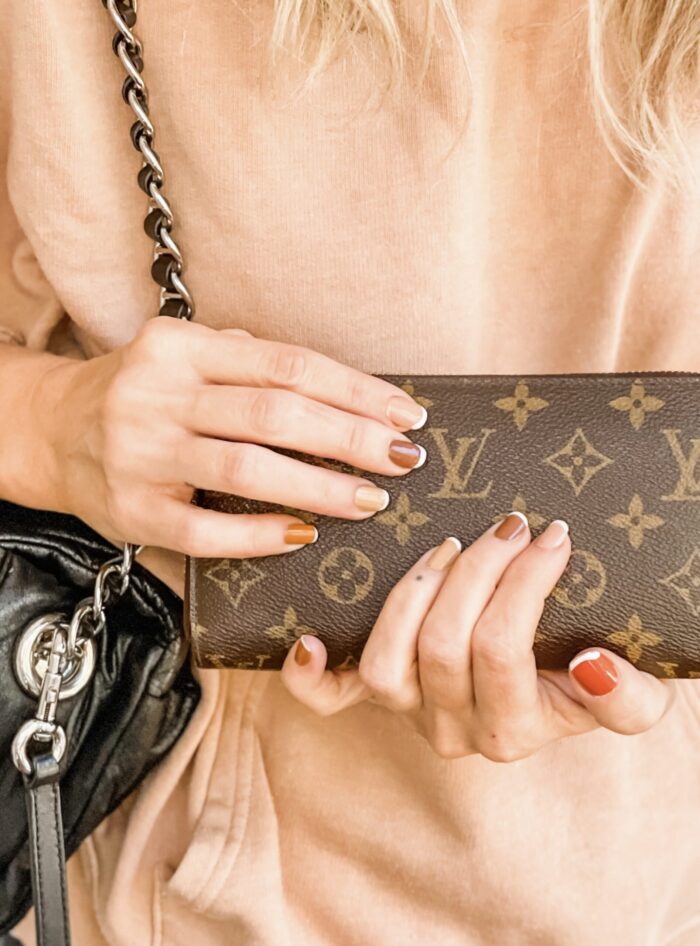
After staring at my pretty dried flowers for a few weeks, I finally had a chance to test them out. And really, I LOVE THEM. No surprise there though 😉 They’re fun on every nail or would make really pretty accent nails for a more simple approach. I noticed the dye from the red flower on my pinky stained my actual nail after the polish chipped off, which is a great reason not to apply them directly to your nail without a few coats of solid lacquer first. You can choose an alternate color or even match the polish colors to your flowers, but I liked the simplicity of the nude as a backdrop which made the colors really pop.
What You’ll Need…
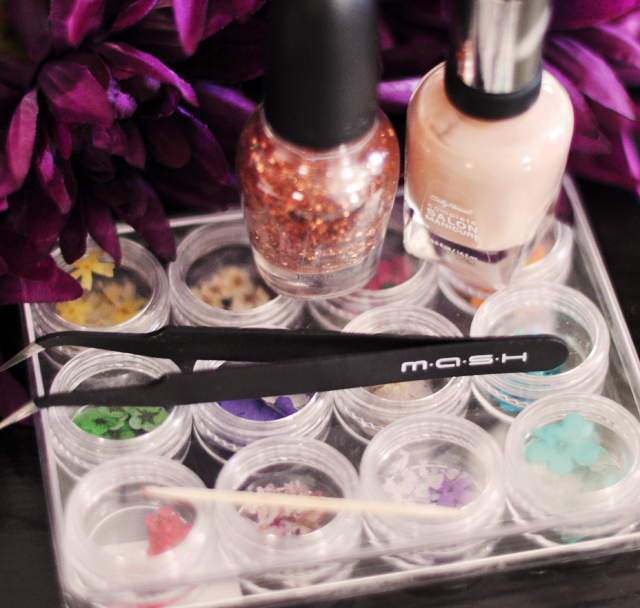
* Real Dried Flowers for nails $5 {for 12 different varieties see all of mine here}
* Nail Art Tweezers and a toothpick
* Flesh-tone or nude nail polish {I used Sally Hansen Salon Manicure Nail Polish: Nude Now}
* Chunky glitter polish {I used Sephora Jewelry Top Coats: Traffic Stopper Copper}
* Heavy duty top coat like Seche Vite Dry Fast.
Steps…

* Section out the flowers you want to use & flip them upside down on your tabletop. I have fairly small nail beds & short nails so I could only use one small flower per nail and a larger one on my thumbs. If you have longer nails, you can overlap a few flowers and create a pretty design.

1. Apply two thin coats of your flesh-toned polish and let dry.
2. Apply one coat of your chunky glitter polish to one nail at a time.
3. With your dried flower upside down on your table, dab your wet nail onto it. {I found this far easier than trying to pick each delicate flower up without tearing it}
4. Carefully set into place with your toothpick.

* Since these are real flowers, some petals stick up more than others {see my pinky?} With your toothpick, set one side in place. Do your other nails one at a time but before your glitter coat dries completely, go back through with your toothpick and press the other sides & petals down and set in place. Your polish will be gummier then, so it will adhere better and your flower has absorbed a bit of moisture and is more pliable as well.
* Once you’ve finished all your nails {or just your accent nails if you like} and they are relatively dry {meaning your flower won’t move} Apply another coat of glitter if you want a glittery affect like mine OR simply apply a clear coat over the flower and entire nail.
* NOTE: after my glitter top coat dried, I used Seche Vite as another top coat to really set it in place and give my nails a thick coating of gloss which also made them appear a little 3d {and prettier & more vivid in person ;}.
Voila!


Have Fun!
Find all of my Nail Art Tutorials Here